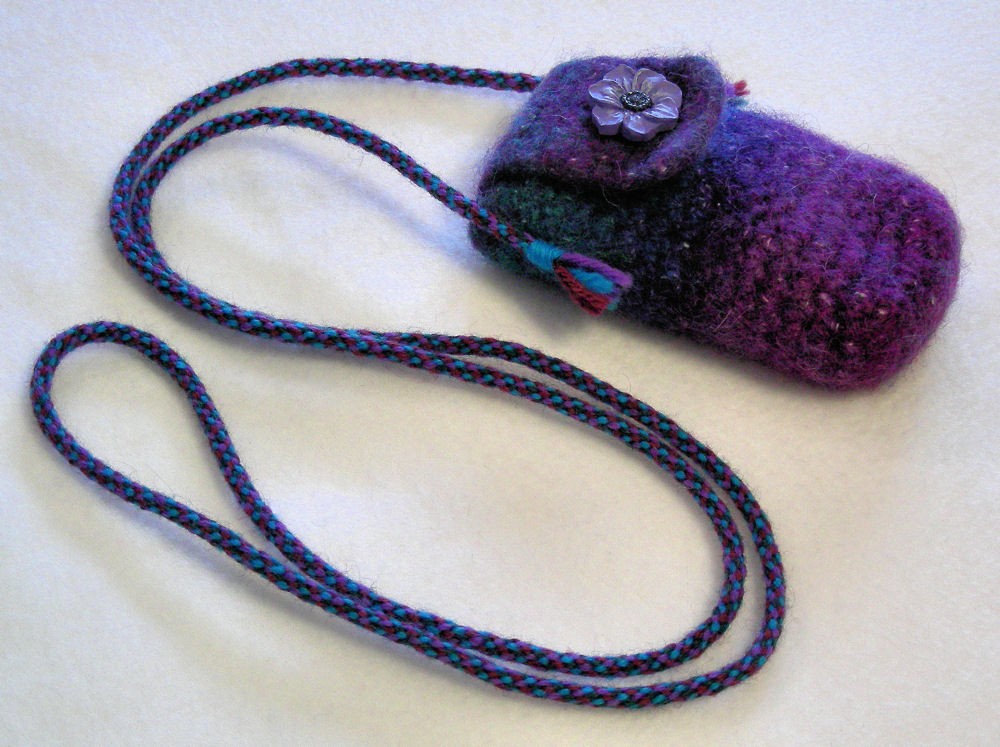
One of the items I offer in JN Originals is felted cell phone cases. One day a customer asked me if I could add a matching shoulder strap. My first attempt at a strap, however, was not pretty. I crocheted a long tube using a small hook, then”fulled” (felted) it in the washing machine. The result was a tangled, lumpy cord that I was too embarrassed to show anyone. It was also too thick for the pouch. Finally, I hit upon another solution: a braided kumihimo cord. The cord was tightly braided, strong and flexible, and allowed me to use multiple yarns that complemented the colors used in the cell phone pouch.
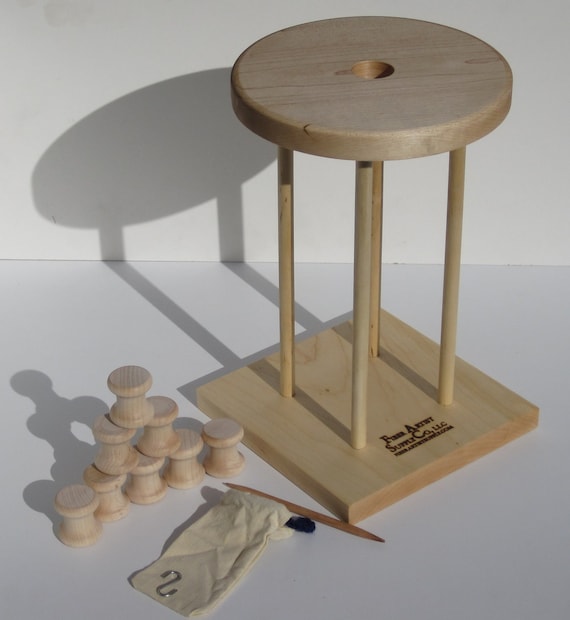
Kumihimo is the traditional Japanese art of braiding. The word itself means “the gathering of threads,” which is how you begin the process. Not much is known about the history of this art because many of the details were kept secret and passed down orally. When you consider that the Samurai used these cords for their swords and helmets, as well as for lacing up part of their armor, the secrecy of the techniques does not seem so strange. Of course, after the Samurai class disappeared after the nineteenth century, kumihimo was employed as a fashion statement. It was used as an obi-jime, a cord that wraps around a kimono sash, for example. It is interesting to note that in Peru, very similar braiding techniques evolved. Rodrick Owen, in his book titled Braids: 250 Patterns from Japan, Peru & Beyond, describes the four pieces of traditional equipment used in Japan today to weave kumihimo braid:
- the Maru Dai, or round stand used to make round braid as shown in Owens’ book
- the Kaku Dai, or square stand used to make flat braids
- the Aya Take Dai, or low stand used to make flat braids with a twined structure (similar to tablet weaving)
- the Taka Dai, or high stand, used to make flat braids with a twill structure
You can purchase a Maru Dai made out of traditional wood on Etsy from various sellers. Just search for “marudai,” and you’ll see a surprising range of products. The Knit Store, for example, is the Etsy storefront for Fiber Artist Supply Company located in Utah. This shop offers not only a Maru Dai, but also wood bobbins, a counterweight bag, and other supplies. One of these days I’d like to get one of these, but for now I am using a more portable alternative, which I’ll describe later in this post.

Ordinarily, wood bobbins are used to keep the threads from tangling, and also to control the tension, but there are soft plastic bobbins that can be purchased. Sometimes threads are wrapped around card stock bobbins. You can also make your own bobbins by using plastic film canisters, filled with weights. The circle at the top of the Maru Dai is called the kagami, or mirror. Below the mirror is a counterbalancing weight, usually a bag attached to the threads. The bag is filled with weights that are half the weight of the combined bobbins.
Kumihimo itself is a soothing practice, silent and rhythmic, that gives you the same feeling other repetitive fiber techniques provide, such as crocheting, knitting and weaving. In the YouTube video shown below, it is very easy to see the patterned movements.
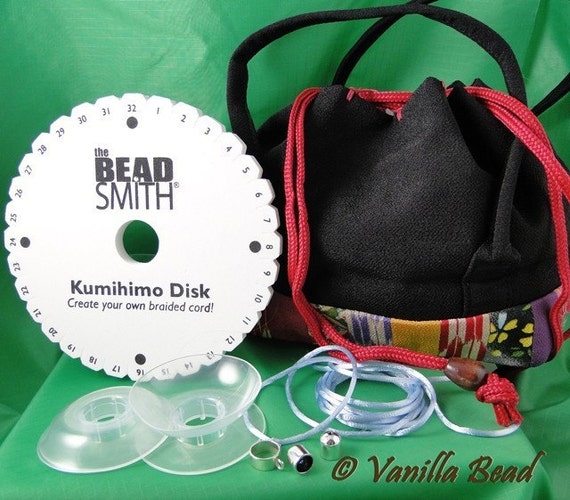
A more portable alternative to the Maru Dai is either the Hamanaka or The Beadsmith® Kumihimo Disk and Plate that are sold on Etsy, on Amazon, eBay, and other Web sites. The disk and plate are made from a dense foam with slots in them that control the tension of the threads. The disk allows you to make round cord, while the plate is good for flat braids. I highly recommend both. If you like to learn new techniques from a book (as I do), a good way to start is the beautifully illustrated and easy-to-follow Beautiful Braiding Made Easy: Using Kumihimo disks and plates, by Helen Deighan. In the book is a template you can use to make your own disk, if you do not wish to purchase one right away. Vanilla Bead on Etsy offers a kit that includes the disk, 8 large bobbins, sample cords, some silver plated end caps for your cord, and a storage bag.

If you are a visual learner, you will be pleased to find out that there are many YouTube videos that illustrate how to use the Kumihimo Disk, such as the one below.
Books about kumihimo that I recommend include:
- Beautiful Braiding Made Easy: Using Kumihimo disks and plates, by Helen Deighan.
- Beginner’s Guide to Braiding: The craft of Kumihimo, by Jacqui Carey
- Braids: 250 Patterns from Japan, Peru & Beyond, by Rodrick Owen
- A Complete Guide to Kumihimo on a Braiding Loom, by Kathy King James
- Braiding for Beaders, by Anne Dilker
- Necklaces Braided on the Kumihimo Disk, by Karen DeSousa
If you have ever done kumihimo braiding to make your own cord, please share your experience in the comments below.
© 2012 Judy Nolan. All rights reserved.


Oooh, new tools, love it! That braid must have taken you awhile Judy, but it is beautiful.
I didn’t know anything about all of this! Very interesting, and helpful. When I “wove” my beadweaving, I did it by hand. This looks very helpful! Your shoulder strap came out nice – thanks for all the links (I love YouTube!) {:-D
That is a gorgeous length of cord indeed. And I love the videos you included, I agree- what meditative process. Perfect solution to your strap needs. Now I want to try it!
Great post about Kumihimo! That’s a perfect solution for a cell phone case strap. I haven’t tried it before, but everyone I know who has loves it. Thanks for all of the useful information and resources.
Beautiful braid – looks like lots of fun, too!
The braided strap turned out great! It’s always fun to learn new techniques 🙂
I won’t be trying this but yours came out beautifully! I like how it adds to the pouch without being too bulky.
Erika
It’s a Wrap Link Party at Artful Rising
I love it when I find what I’m looking for on blogs I “know!” I want to start making braided cords for some new items I’m planning for my shop in 2015 and I was looking for wood kumihimo disk ideas. I really want a little disk to get started working on our trip to Florida next week, but I think I can talk my husband into making me something really nice on our lathe.